
Use Google Maps to follow a RouteSketcher route from Your Phone
Want to follow a GPX route using Google Maps on your smartphone? While Google Maps doesn't allow directly to import GPX files, you can upload your route to Google My Maps and then access it from the Google Maps mobile app. This tutorial shows you the complete process step by step.
This is perfect when you've created a route in RouteSketcher and want to navigate it using the familiar Google Maps interface, or when you have a GPX file from any other source.
Prerequisites
Before you begin, make sure you have:
- A GPX file saved on your computer or Google Drive
- A Google account
- The Google Maps app installed on your smartphone
- Access to a desktop or laptop browser (My Maps works best on desktop)
Tip: You can export a GPX file from RouteSketcher by clicking the Download button and selecting Snapped Route or Raw Route. Check out our GPX export tutorial for details.
Part 1: Uploading GPX to Google My Maps (Desktop)
Step 1: Open Google My Maps
Go to Google My Maps in your web browser. You'll need to sign in with your Google account if you haven't already.
Step 2: Access Your Maps
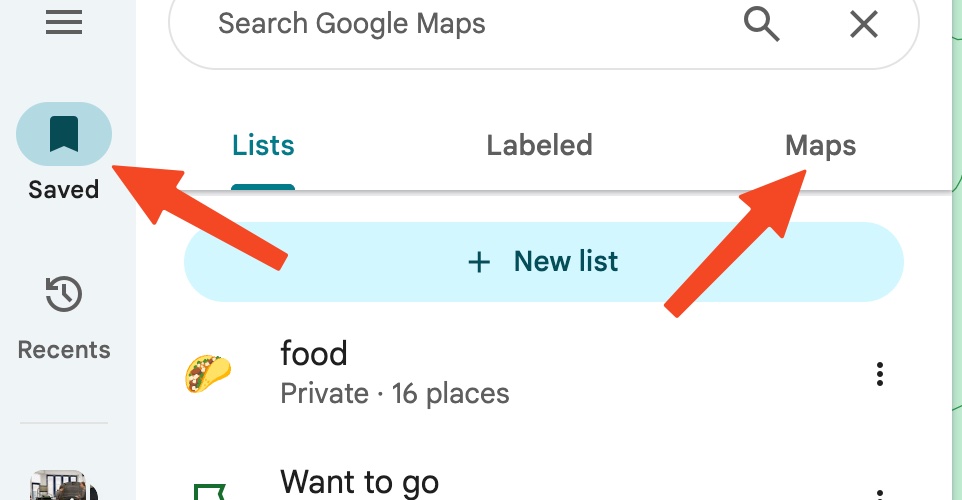
Once signed in, click on the hamburger menu (three horizontal lines) in the top left corner. From the menu, select Saved, then click on Maps.
Step 3: Open My Maps
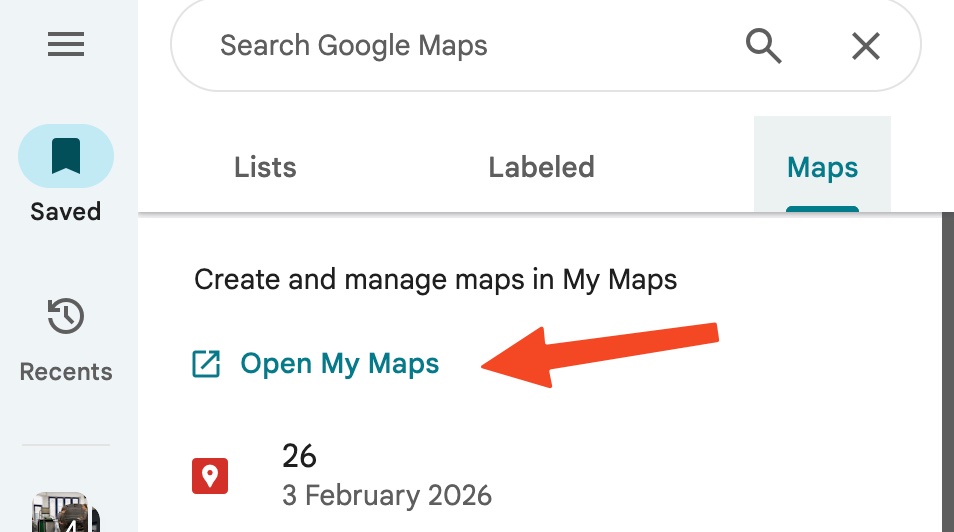
Click on Open My Maps at the bottom of the list. This will open Google My Maps in a new browser tab where you can create and manage custom maps.
Step 4: Create a New Map
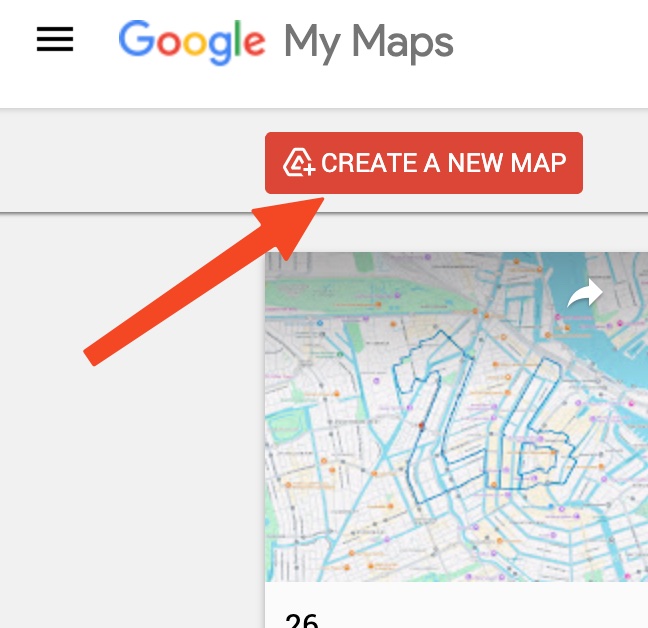
Click the red + Create a new map button to start a fresh map project.
Step 5: Import Your RouteSketcher GPX File
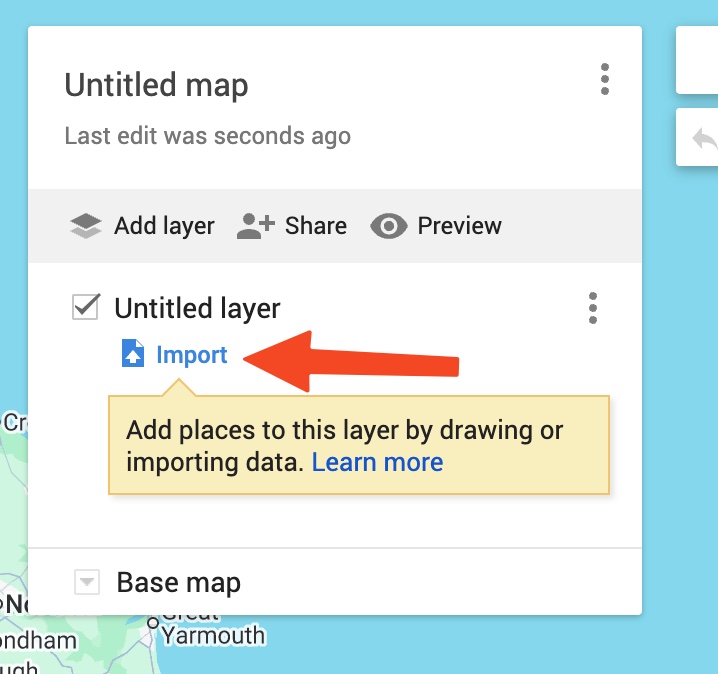
In your new map, click on Import under the "Untitled layer" section. This opens the file import dialog.
Step 6: Select Your GPX File
You can either:
- Drag and drop your RouteSketcher exported GPX file into the import window
- Click "Select a file from your computer" to browse your local files
- Select from Google Drive if your file is stored there
Step 7: View Your Imported Route
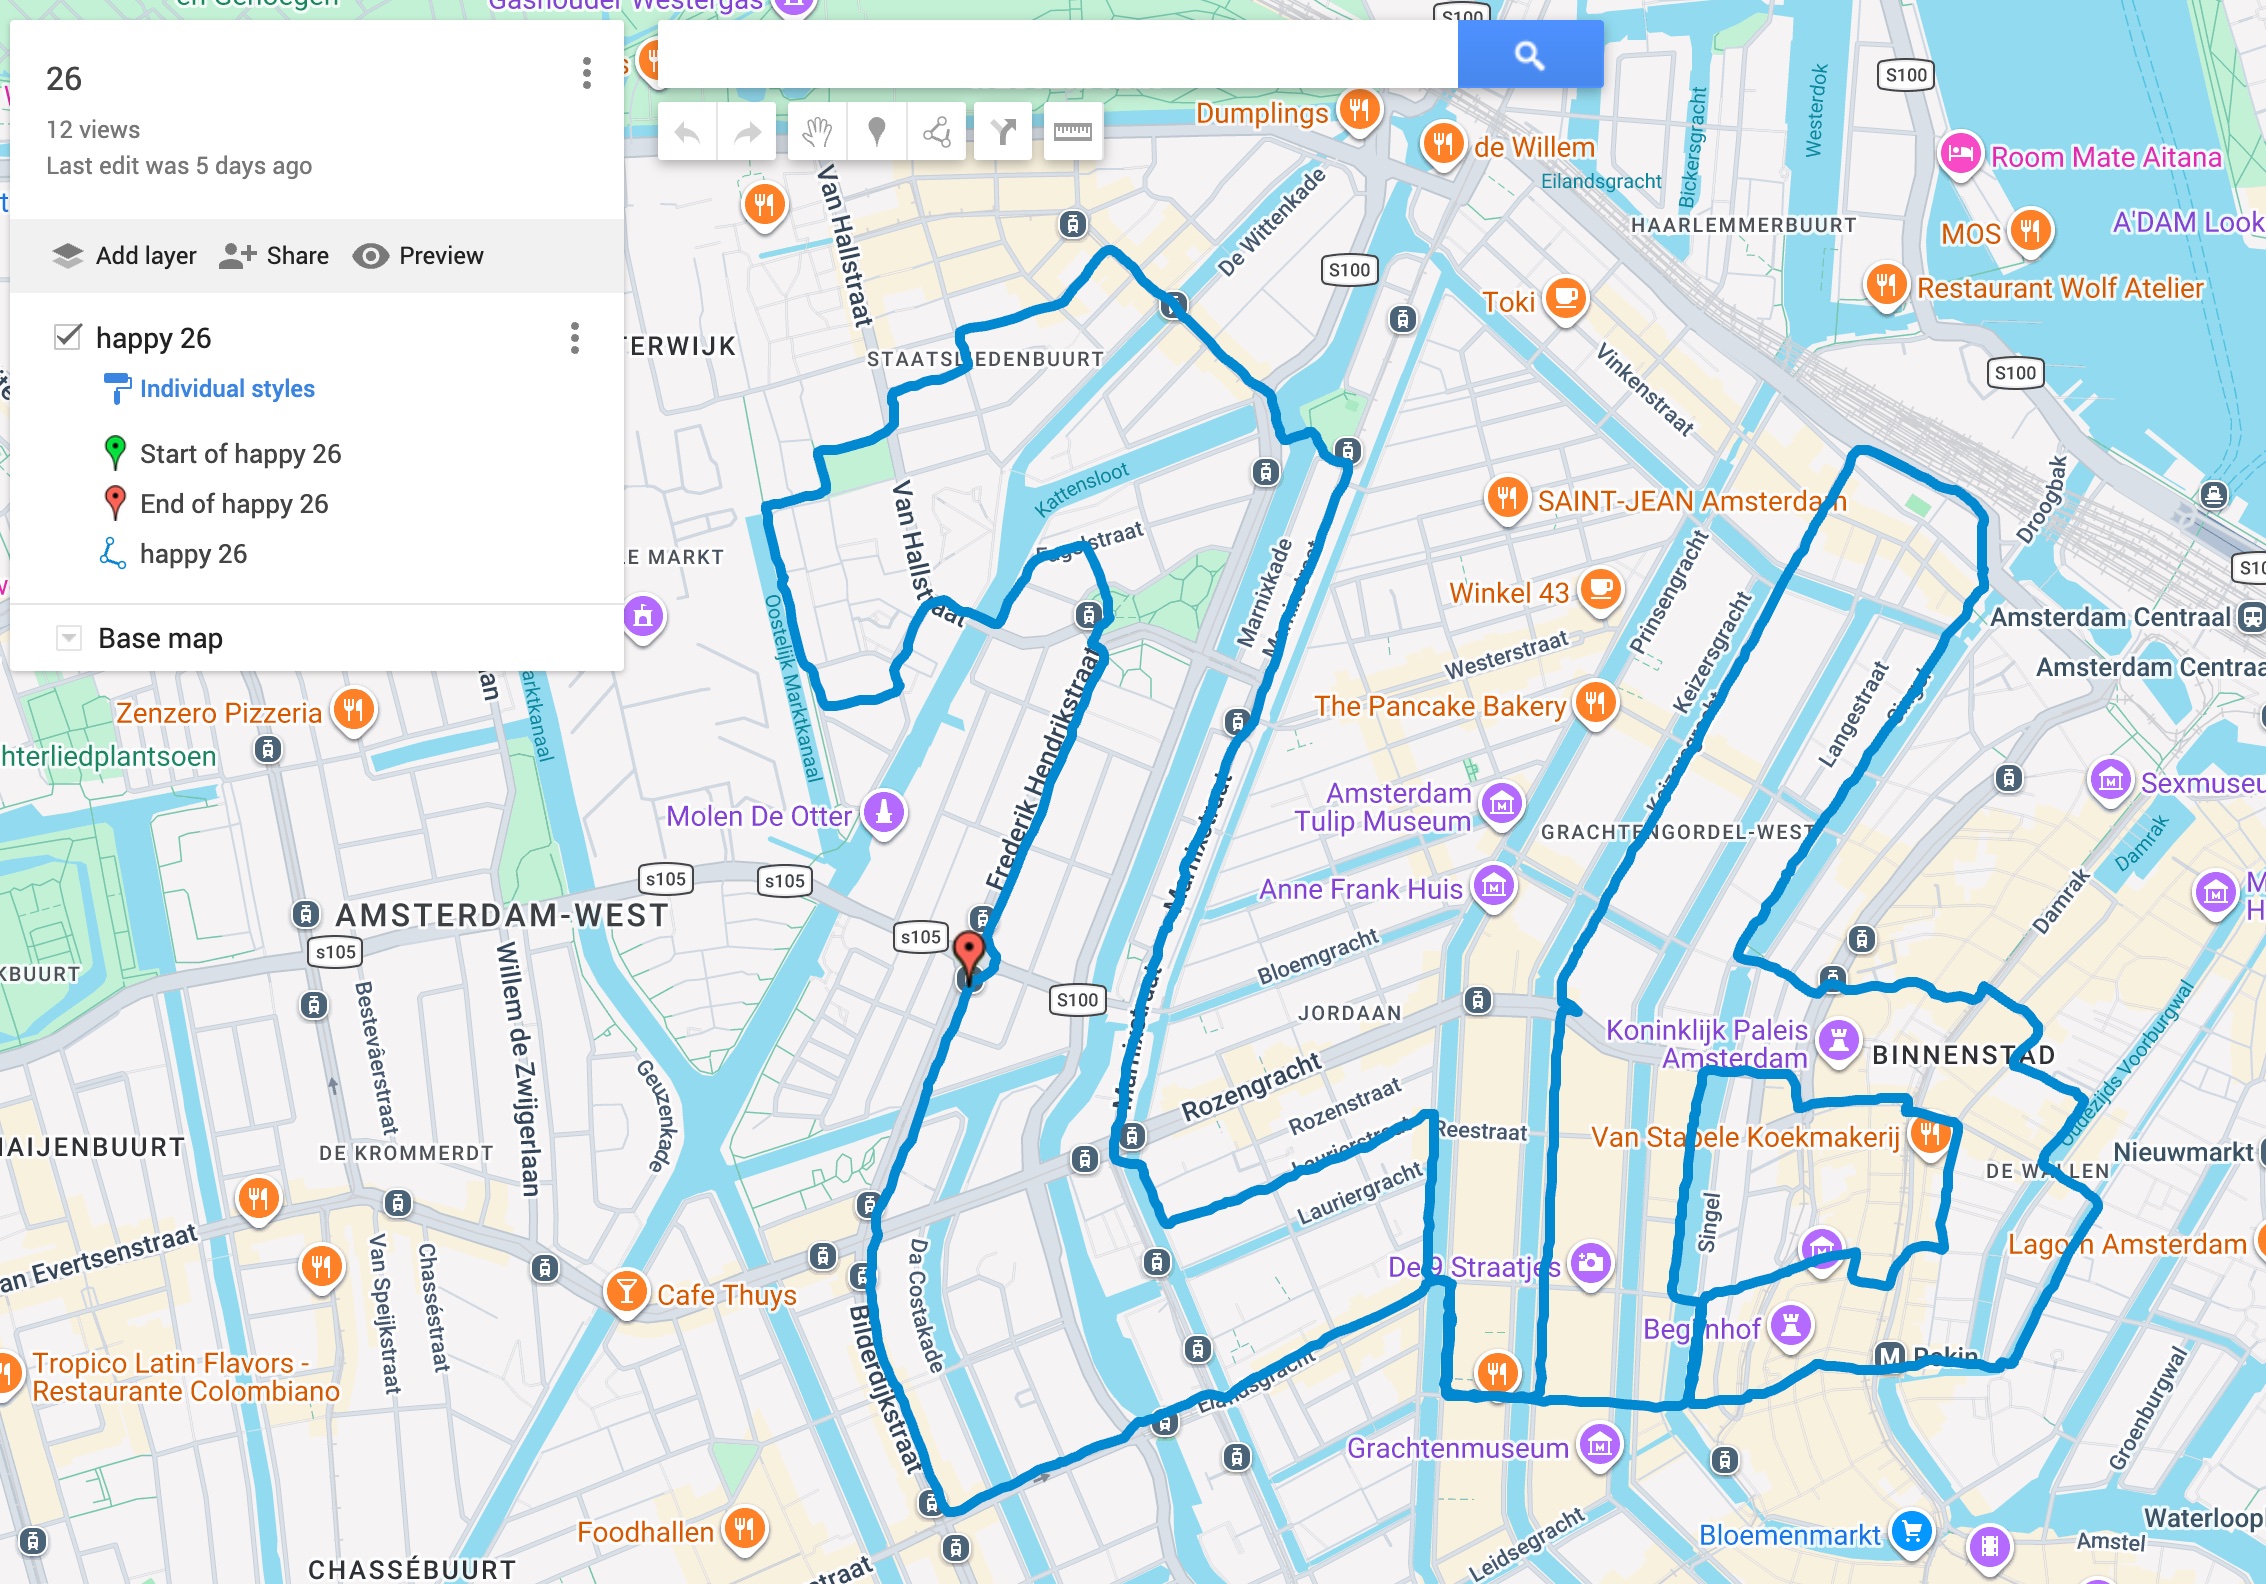
After a few seconds of processing, your RouteSketcher GPX route will appear on the map. You can:
- Zoom in/out using the buttons at the bottom right or your mouse scroll wheel
- Pan around by clicking and dragging the map
- Click on the route to see details about specific points
Step 8: Customize Your Map (Optional)
Click on the map title "Untitled map" at the top left to give it a meaningful name and add a description. This makes it easier to find later.
You can also:
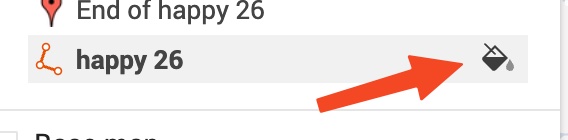
- Change the route color by clicking on the route and selecting a new color
- Add markers at specific points of interest
- Add additional layers for different route segments
Step 9: Verify the Upload
Go back to your original Google Maps tab and refresh the page. Navigate to Saved → Maps and verify that your newly created map appears in the list.
Part 2: Navigating the Route on Your Smartphone
Now that your route is saved to your Google account, you can access it from the Google Maps mobile app.
Step 10: Open Google Maps App
Launch the Google Maps app on your smartphone. Make sure you're signed in with the same Google account you used to create the map.
Step 11: Access Saved Maps
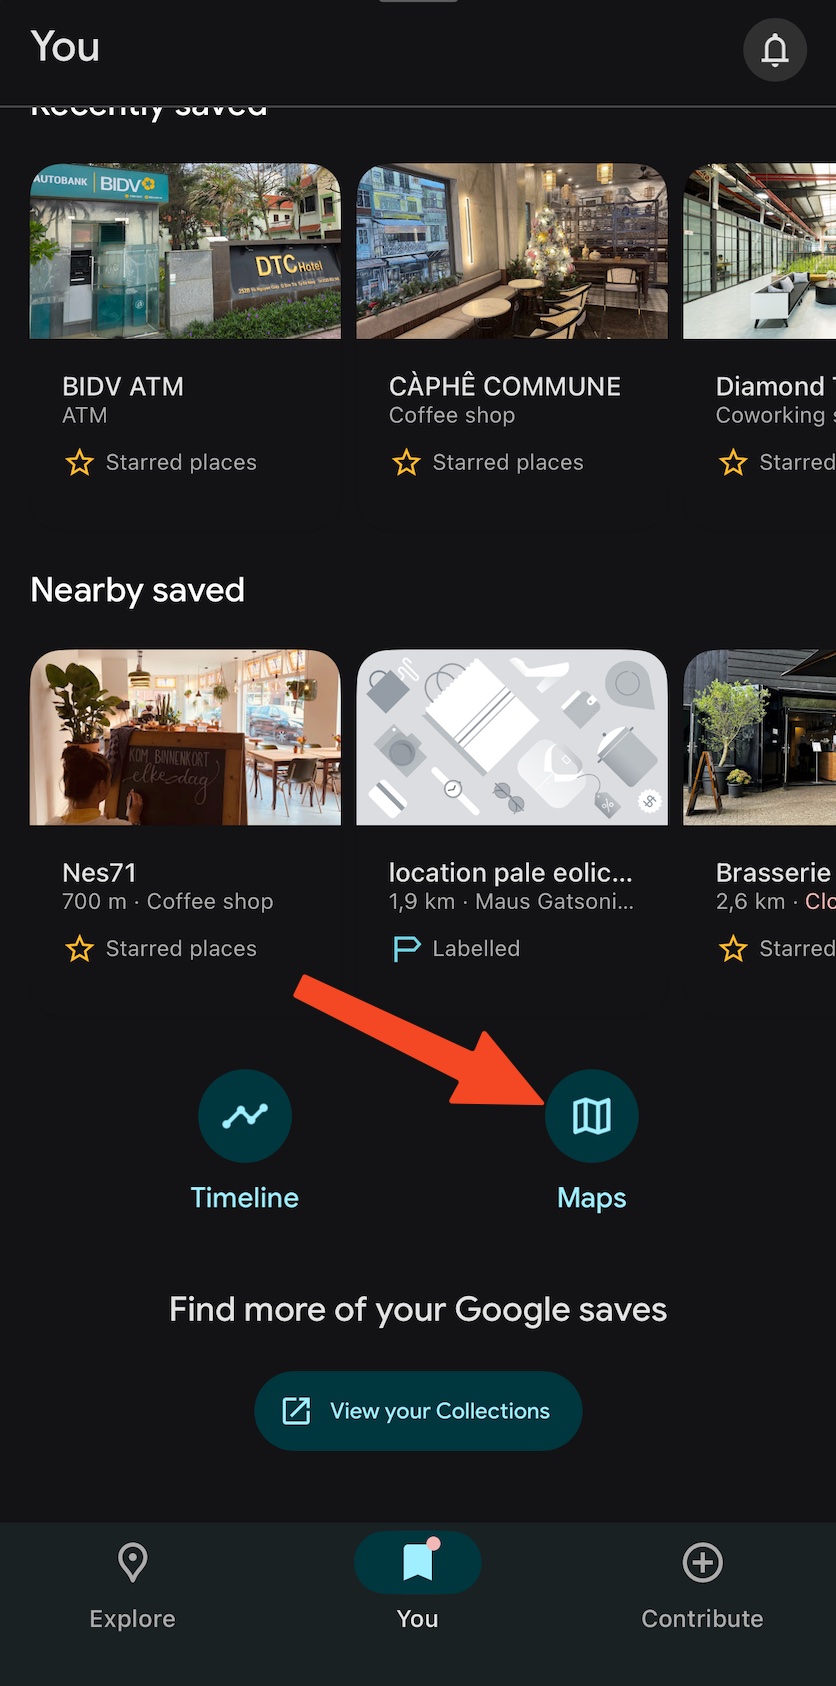
Tap on You at the bottom center of the screen (between "Explore" and "Contribute").
Step 12: Find Your Map
Scroll down and tap on Maps. You'll see a list of all your custom maps. Select the map containing your GPX route.
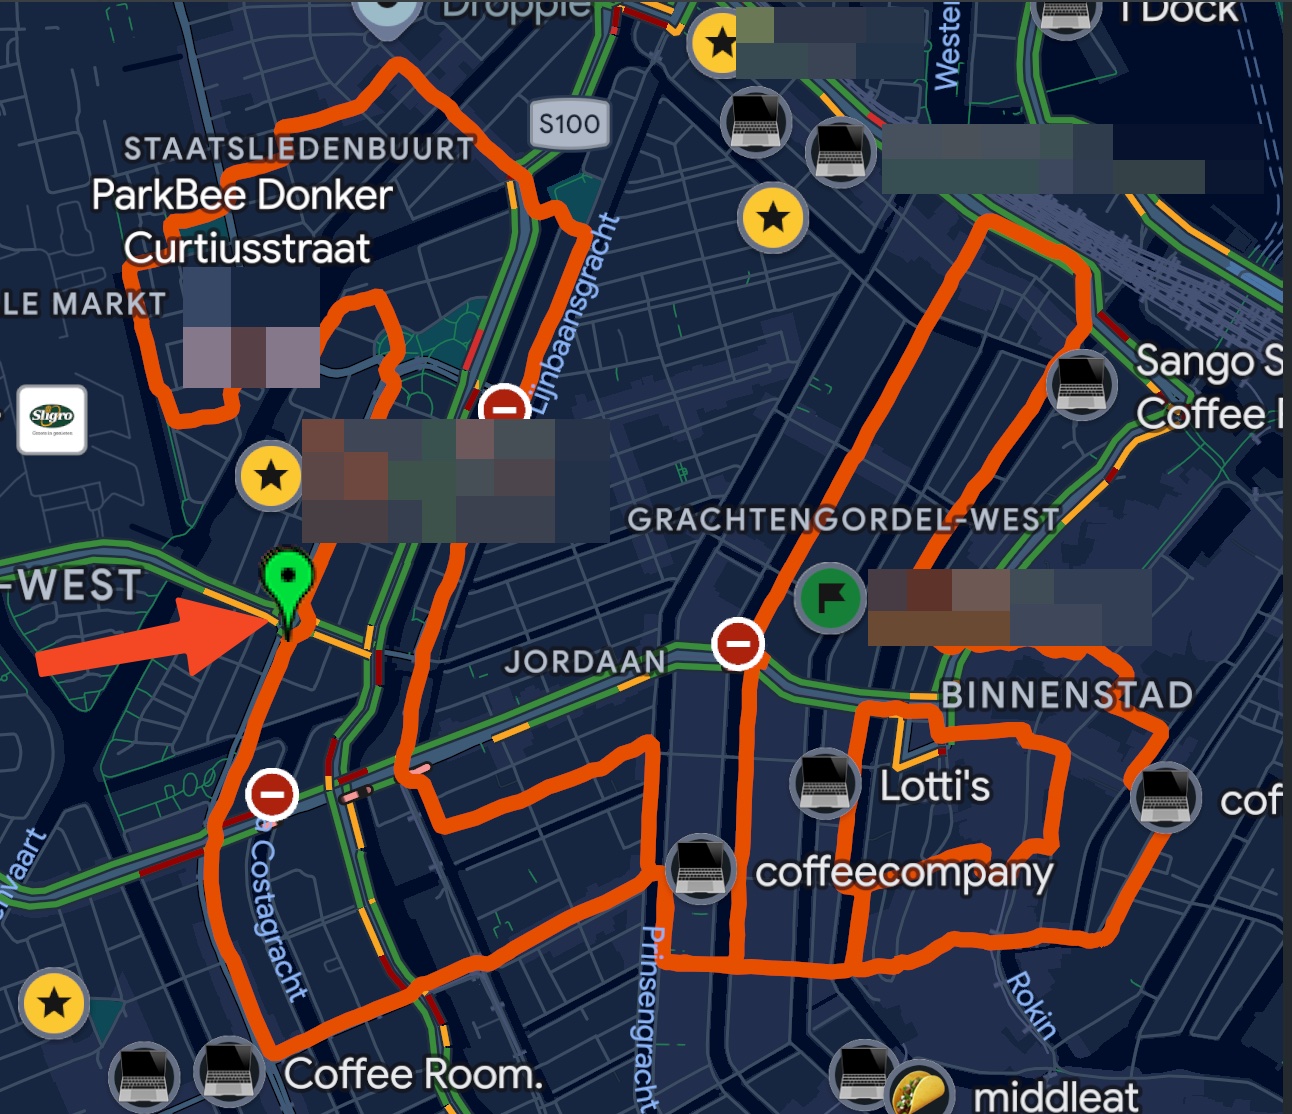
Step 13: View the Route on Mobile
Your imported track will be displayed on the mobile map. You can pinch to zoom and pan around to explore the entire route.
Step 14: Get Directions to the Start
Tap on any point along the route (preferably the starting point). Google Maps will show information about that location. Tap on Directions to get navigation instructions from your current location to the start of the route.
Step 15: Start Navigation
Tap Start to begin turn-by-turn navigation to your route's starting point. Google Maps will guide you there using your preferred transportation method (driving, walking, cycling, etc.).
Important Limitations
While this method works well for viewing your route, there are some limitations to be aware of:
Google Maps Won't Follow Your Exact Route
Unlike dedicated GPS devices (Garmin, Wahoo) or apps (Komoot, Ride with GPS), Google Maps cannot provide turn-by-turn navigation along your custom GPX route. You will still be able to follow it visually but not with a turn-by-turn assistance.
What Google Maps CAN Do
- ✅ Display your route as a visual overlay on the map
- ✅ Provide directions to any point on your route
- ✅ Help you locate the start/end points
- ✅ Show your current location relative to the route
What Google Maps CANNOT Do
- ❌ Provide turn-by-turn navigation along your GPX route
- ❌ Alert you when you deviate from your custom route
- ❌ Calculate distance/elevation for your GPX track
- ❌ Record your activity along the route
Need True GPX Navigation? For proper turn-by-turn GPX navigation, consider using a Garmin watch or dedicated cycling computer. Check out our Garmin export tutorial to learn how to export from RouteSketcher to your Garmin device.
Tips for Best Results
- High Contrast Colors: When customizing your map, choose a bright color for your route (like red or orange) that stands out against the Google Maps base layer
- Add Waypoints: Mark important points along your route (turns, water stops, scenic viewpoints) with custom markers
- Download for Offline Use: Before heading out, download the map area for offline access in case you lose cell signal
- Battery Conservation: Keep your phone charged—constant GPS use drains battery quickly
Troubleshooting
Route not appearing in Google Maps app?
- Ensure you're signed into the same Google account on both desktop and mobile
- Try refreshing the Saved → Maps list by pulling down
- Wait a few minutes for sync to complete across devices
Import failed in My Maps?
- Verify your GPX file is valid and not corrupted
- Try exporting the GPX again from RouteSketcher
- Check that the file size isn't too large (My Maps has import limits)
- Ensure the file has a
.gpxextension
Route looks different than expected?
- My Maps may simplify complex routes with many points
- Very long routes may be truncated
- Some GPX features (like elevation data) won't be displayed
Related Tutorials
Now you know how to upload your GPX tracks to Google Maps! While it has limitations compared to dedicated GPS navigation, it's a free and accessible way to visualize and follow your routes using the world's most popular mapping app.
Happy exploring! 🗺️