
How to Import a Route from a GPX File
Have a GPX file from a previous run, a friend's route, or downloaded from another app? RouteSketcher makes it easy to import GPX files and convert them into editable sketches. This is perfect for recreating routes you've found online, editing existing activities, or using a route as a starting point for your GPS art creation.
This tutorial will guide you through importing a GPX file into RouteSketcher and turning it into a fully editable sketch that you can modify, save, and export.
What is a GPX File?
GPX (GPS Exchange Format) is a standard file format for storing GPS data. Most fitness apps and GPS devices can export routes in this format, including:
- Strava - Export your activities or routes
- Garmin Connect - Download courses or activities
- Komoot - Export planned routes
- AllTrails - Download hiking trails
- Ride with GPS - Export cycling routes
- And many more...
Step 1: Access the GPX Importer
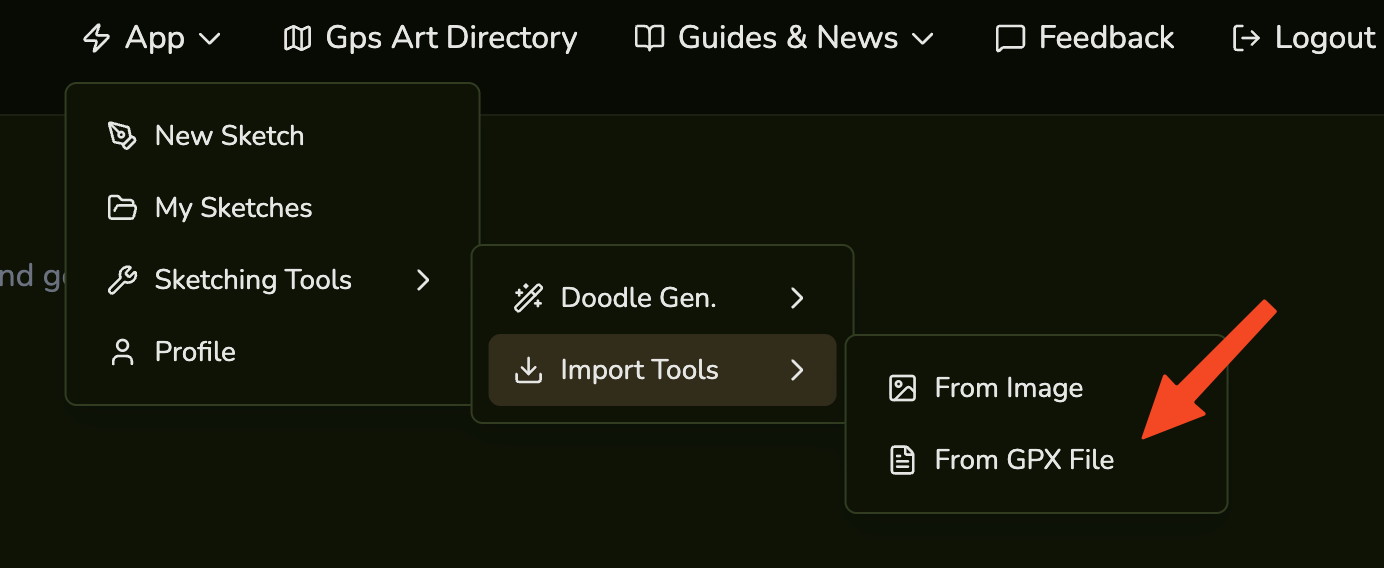
After logging in, navigate to the GPX Importer by selecting App -> GPX Importer from the main menu, or go directly to routesketcher.com/gpx-importer.
Step 2: Upload Your GPX File
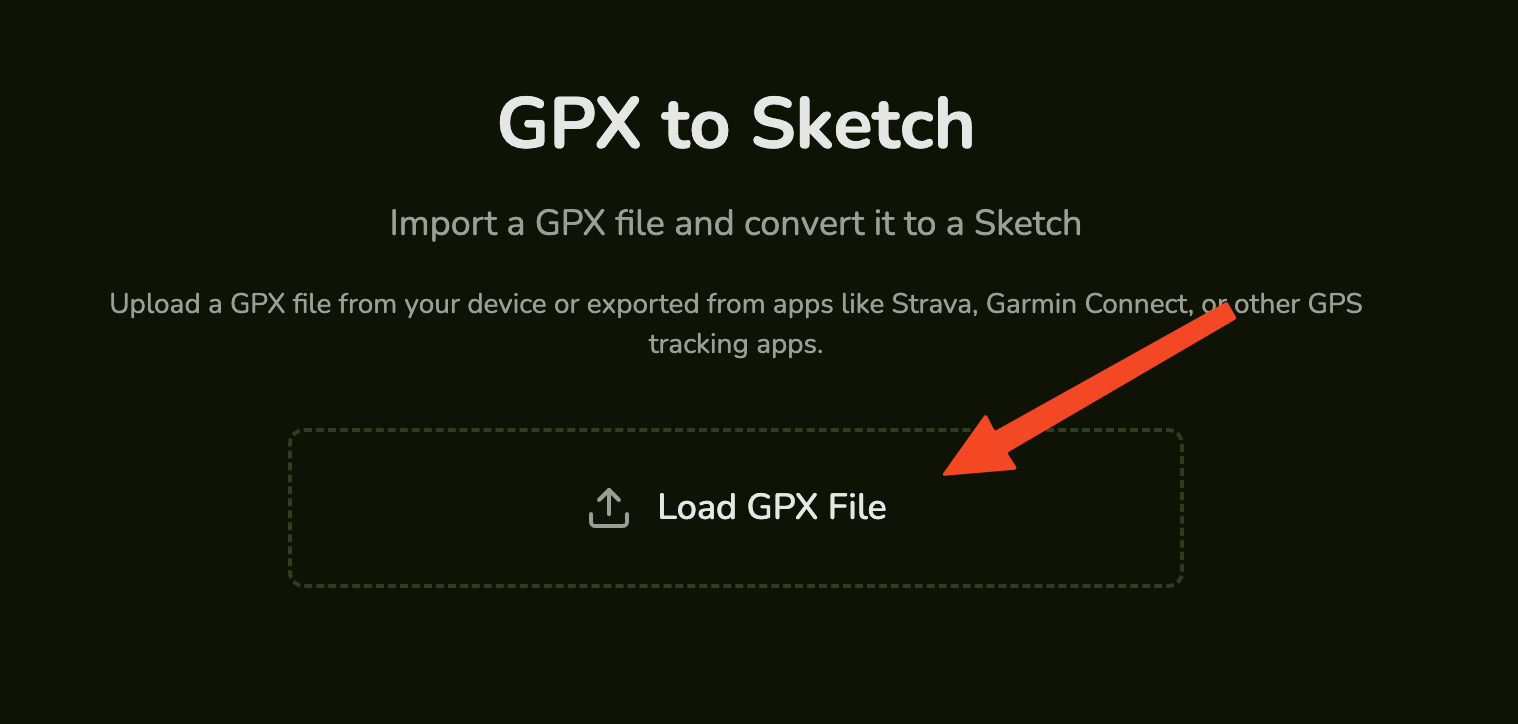
Click the Load GPX File button to open your device's file picker. Select the GPX file you want to import.
Supported Formats: The importer accepts
.gpxfiles up to 10MB in size. Both GPX 1.0 and GPX 1.1 formats are supported, including files with track points (trkpt) or waypoints (wpt).
Step 3: Review the Loaded Points
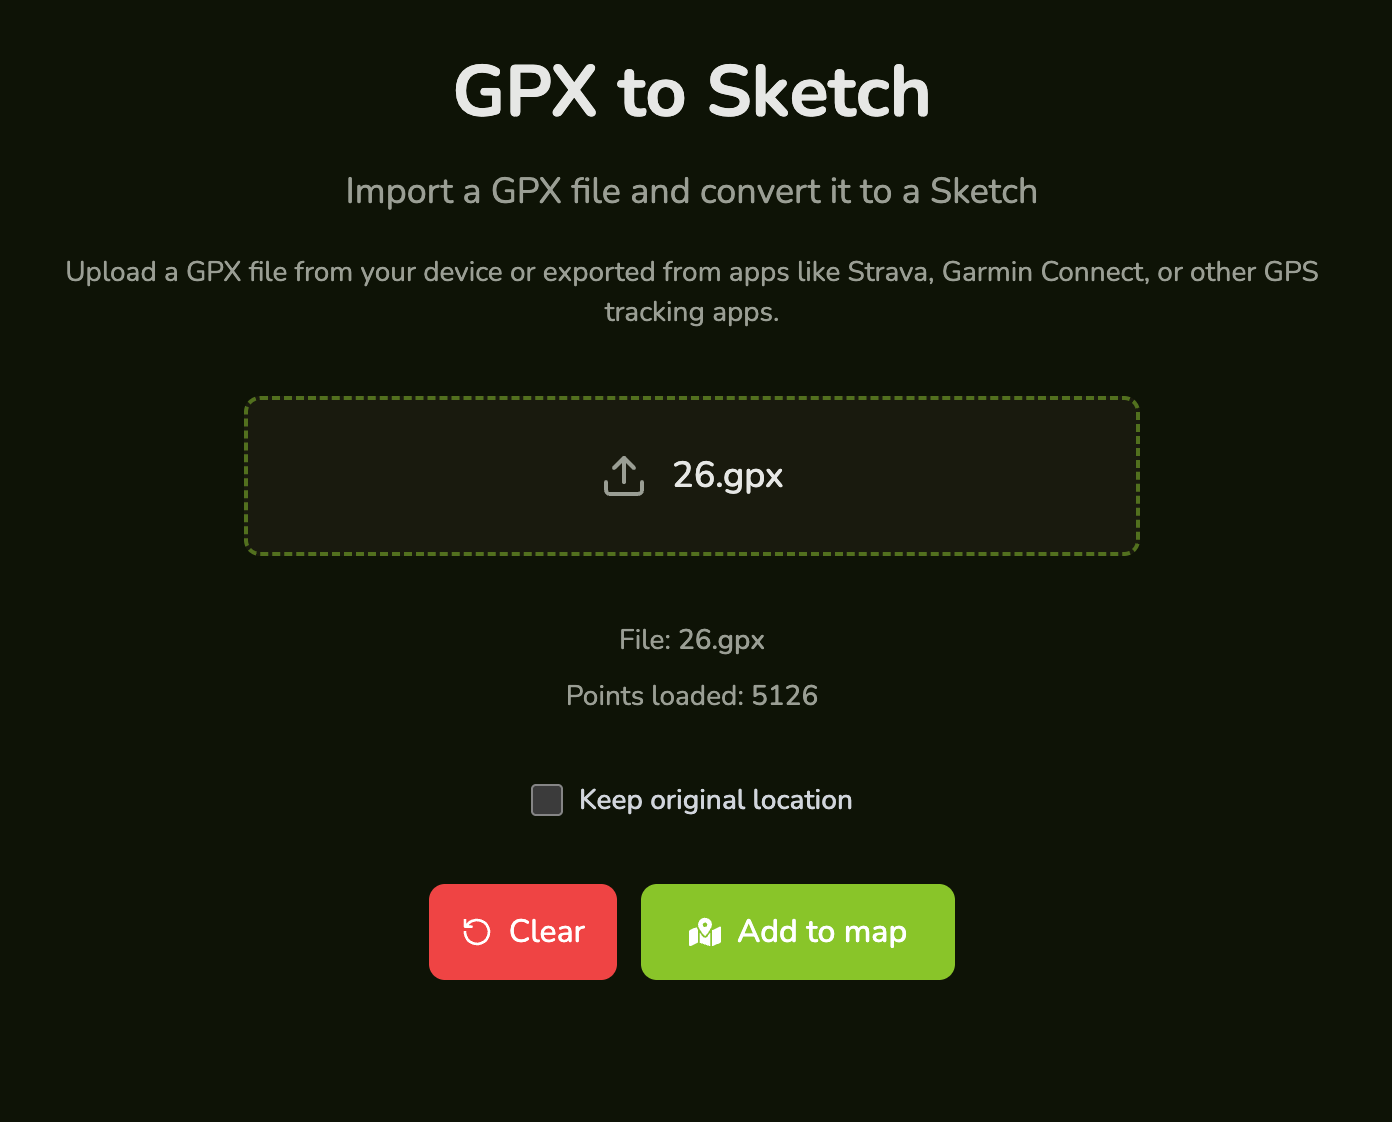
Once the file is loaded, you'll see a confirmation message showing how many points were extracted from your GPX file. The file name and point count will be displayed on screen.
Step 4: Choose Location Options
Before adding the route to the map, you have an important option to consider:
Keep Original Location - Check this box if you want to import the route at its original GPS coordinates. This is useful when:
- You want to run/cycle the exact same route
- The route is in your local area
- You're editing a route you've previously created
Leave this unchecked if you want to move the route to a different location (e.g., importing a cool route shape to use in your own city).
Step 5: Add to Map
Click the Add to map button to load your GPX route into the sketch editor. You'll be taken to the map view where you can select where to put your sketch.
Nb. if you checked the "Keep original location" checkbox, the start location will match the coordinates of the imported GPX file.
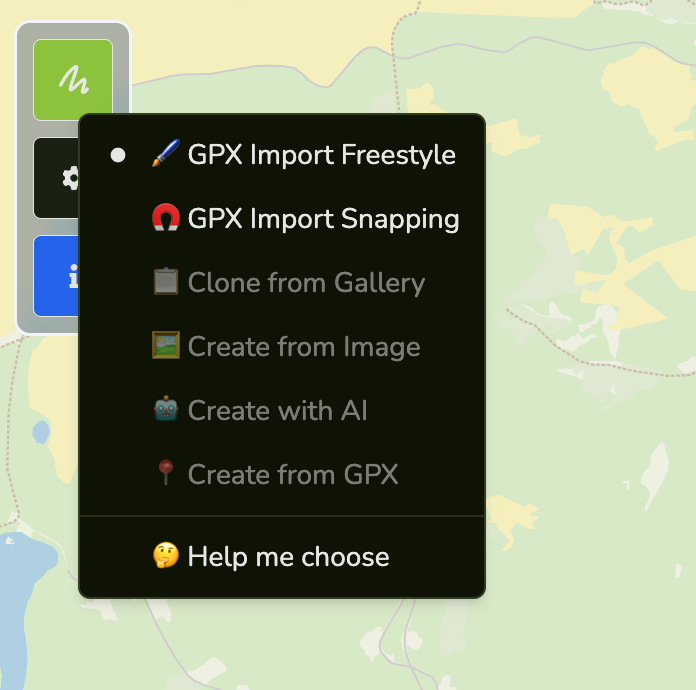
Step 6: Freestyle vs Snapping
Choose between two modes when placing your imported route:
Road Snapping Mode - Automatically aligns your route to the actual road network. This is ideal when you're adapting a route from one city to another or when the original GPS data has drift that needs correction.
Freestyle Mode - Preserves the exact shape of your imported route without road alignment. Best for parks, trails, or rural areas where no buildings are present, or when you want to maintain the original GPS track precisely.
Select your preferred mode from the toolbar before placing the route on the map.
Step 7: Edit your route if necessary
Once on the map, your GPX route appears as a sketch that you can edit just like any other RouteSketcher drawing:
- Move the entire route to a new location
- Scale it up or down to fit your desired distance
- Rotate it to align with local roads
- Edit individual points for fine-tuning
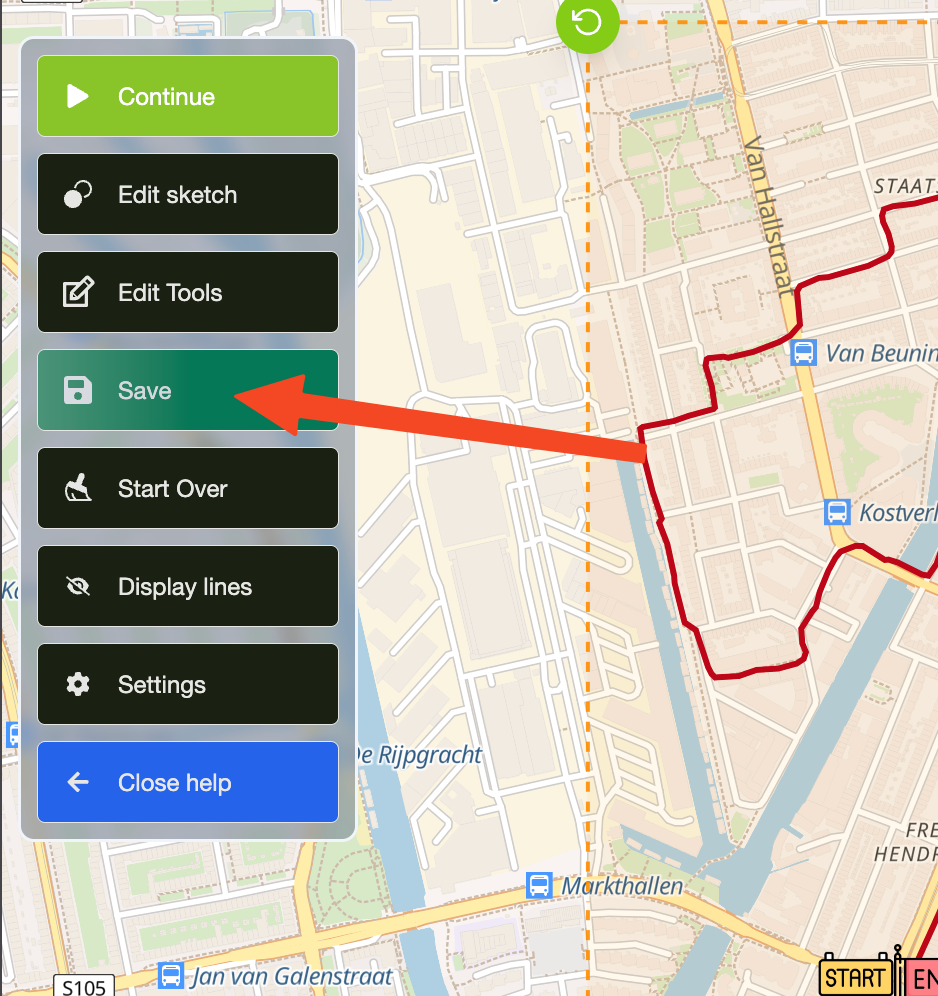
Step 8: Save Your Sketch
Once you're happy with the imported route, click Save and give it a name. Your imported GPX is now a full RouteSketcher sketch that you can access anytime.
Common Use Cases
1. Recreating a Friend's Route
Got a GPX file from a running buddy? Import it and use "Keep Original Location" to run the exact same route, or move it to your neighborhood.
2. Editing a Completed Activity
Ran a route that was almost perfect? Export it from Strava, import into RouteSketcher, fix the sections you want to change, and create an improved version.
3. Using Route Templates
Found a cool GPS art shape online? Import it, resize it to fit your local streets, and make it your own creation.
4. Combining Multiple Routes
Import multiple GPX files and combine them to create longer, more complex routes or GPS art designs.
Troubleshooting
"No track points found" error?
- Ensure your GPX file contains track points (trkpt) or waypoints (wpt)
- Some GPX exports only contain route points (rtept) which are not currently supported
- Try exporting from your source app with a different export option
File too large?
- GPX files must be under 10MB
- For very long activities, consider trimming the GPX file before importing
- You can use online tools to reduce the number of points in your GPX file
Route appears in wrong location?
- Make sure "Keep Original Location" is checked if you want the original coordinates
- If unchecked, the route will be centered on the map for repositioning
Points seem off or drifted?
- This is normal for GPS data from activities - GPS signals can drift
- Use Edit Points mode to manually adjust any problematic sections
- Apply road snapping to align the route to actual roads
What's Next?
Now that you've imported your GPX file, you can:
- Edit and refine the route using RouteSketcher's drawing tools
- Export it back to GPX for use on your GPS watch or fitness app
- Make it public to share with the RouteSketcher community
- Create GPS art by modifying and combining imported routes
Check out our other tutorials:
Ready to import your first GPX file? Go to the GPX Importer and start creating!